Tuesday, November 17, 2015

Avengers Birthday Cupcakes

My baby boy is turning 4 today.  It's so hard to believe how much he's grown and how much time has gone by since seeing his sweet little face for the first time but I really can't remember life without him.  His arrival created our family and I'm beyond happy to call him my own.

Monkey can not get enough of Iron Man, Hulk or any of the other Avengers.  You've got to give it to the kid.  He loves his superheroes!  While he wanted a dinosaur birthday cake (more on that later), he wanted to bring Avengers cupcakes into school with him.  After scouring the internet for ideas, I came across cupcake toppers.  Of course! Why didn't I think of this at first?  Well let me tell you my friend, this was a first time project for me.  I bought all of the fondant and played around a little to see if I had any hopes of putting these things together.  As long as you have all the primary colors (along with black and white), you can make almost any color under the sun.


Captain America?  Got it - he was all cookie cutters (LOVE these and these).  Easy Peasy.  Thor? Yep.  Just roll up fondant and shape into a box and roll the handle.  Iron Man?  The whole reason why I'm making these things to begin with?  Ugh, he was a pain in my behind!  Every topper I found on Pinterest or Etsy was either a version that looked like an alien or someone had used an iron man cookie cutter.  Because I live overseas, it takes forever a while to get mail so I was out of time.  Then it came to me.  Why not print out the simplest Iron Man mask I could find on card stock, cut it out and use it as a template?  So that's what I did.  After the 3rd topper, I thought, "Man, I've got this.  I'm an expert."  After the 5th topper, I thought, "Thank God I'm only making 5 of each."

Ok, with Captain America, Thor and Iron Man down, I had 3 more designs to make.  I decided to give myself a little break and use a "4" cookie cutter for one of the designs.  It fits, right?  Ok, 2 more designs to go.  You can't have the Avengers with Hulk.  I made a Hulk face (quite cartoon-y but so easy) and a Hulk fist punching through a (purple) brick wall.  Realistic, right?  The face topper just didn't go with the others so I went with the fist.  Oh man, those took some time.  A little hint if you want to make the punching fist...watch a bunch of tutorials on youtube and practice practice practice.  You could use your kids' play-dough (there's no shame) or go right into it and use fondant but I'd have to say those took the most time.


The last design was the Avengers symbol.  The "A's" were all cut out by hand and the circle around the A was cut using the same cookie cutters I used to cut out the white "stripe" in the Captain America shield.  Annnnnd DONE!  Pop those bad boys on top of cupcakes in some foil liners (I think silver really finishes off the superhero vibe) and send them off. Whew!  I'll tell you, after having never made anything like this before, my mind was constantly going to "what is plan B if ____ doesn't work?" and when I closed the box of FINISHED cupcakes for the hubs to bring to Monkey's preschool, I felt on top of the world!  I did it!


If you're looking for an American buttercream that tastes AMAZING and is stiff enough to hold these toppers, Glorious Treats has a wonderful recipe and I'll definitely be using it again for Sister's smash cake.  Ok, enough relaxing!  Off to bake Monkey's Dinosaur birthday cake!

Thursday, November 12, 2015

DIY Silhouette Christmas Ornament

So I've been obsessing over my kids' silhouettes lately.  I just made two prints and framed them in our dining room and after scrolling through my Christmas Pinterest list (yes, I know it's a little early to think about Christmas but with two November kids birthdays, I need to be prepared for Christmas gifts), I came across a beautiful silhouette ornament from Paloma's Nest.  Feeling frugal, I can't fork over $40 for an individual ornament (although I sure would love to!) and figured there has got to be a way I can make this.

DIY Silhouette Clay Christmas Ornament

So this is how I made my version:
1. Using a white polymer clay, knead and roll it flat with a rolling pin (or in my case, my son's playdoh roller).
2. Cut out whatever shape your heart desires with a cookie cutter (these are great to have so you have multiple sizes for multiple projects).  I think a circle is best to go along with the classic look but you could also try an oval.
3. Punch a hole in the top of the shape with a normal drinking straw (so the ornament can actually be hung)
4. Follow the baking instructions on the packaging.  For sculpey, the clay should be placed on a glass dish and baked at 275°F for 15 minutes for every 1/4 inch of clay thickness.  My oven runs hot but I baked mine for about 7 minutes.
5. Using a fine tip sharpie, trace the profiles of your children (all that's needed is a profile picture of your child, printed and cut out) onto the ornaments.
6.  Follow up with chalky finish paint.  I recommend filling in the silhouette with the sharpie acting as a primer before painting but if you'd rather not, it will still turn out.  You'll just need a few more coats of paint (which dries crazy fast).
7. I used regular twine that I had lying around to hang the ornaments but you could use bakers twine or ribbon, and slip it through the hole you made with the straw.

This has got to be one of the easiest, cheapest (and quickest) crafts I've done.  I know it isn't perfect and it doesn't look as good as the $40 one but I think it'll work out just fine for the grandparents who don't get to see the kids as often as we'd all like.  The great part about this craft is you could use a different paint color and completely change the "feel" of the ornament.  Hot pink? Gold? Ugh, I'm in love with the possibilities!

Monday, September 28, 2015

October Sensory Tub

Monkey has been into arts and crafts lately...and really everything to do with the imagination and learning.  I've never made a sensory tub before but I've heard nothing but positive things about them and figured why not give it a shot.


I gave myself some time to collect everything I needed (although I could have gotten a ton more!) and piled it all into a plastic bin.  Monkey saw it sitting on the dining room table and wanted to open it right away.  I had some will power and held him off for a couple of days but gave in today during Sister's nap time.

I am proud to report...he LOVED it!  His favorite item?  The skulls...We'll see how long it lasts to see if I'll make another for November but I'm optimistic for now!


Items in the Sensory Tub:
Black Eye Peas
Mini Plastic Pumpkins
Spider Rings
Pumpkin Spice Play Dough
Halloween Cookie Cutters
Glow in the Dark Bats
Plastic Skulls (similar here)
Orange & Purple Plastic Beads

Monday, May 13, 2013

Baby Shower

We weren't sure the weather was going to hold out for us to hold my sister's baby shower over the weekend.  We had to move some decorations inside while the weather made up its mind and covered the tables with trash bags but alas, it turned out to be a gorgeous day!  My mom and I decided to hold the shower for both the mom and dad-to-be because everyone was traveling so far to come celebrate and we figured it would be great to have a party with spouses and kids too.  

The tiffany blue and orange theme came together beautifully.  We made yummy "Tiffany Blue Punch" (non alcoholic) which was a huge hit and had some champagne drinks for those of us who were able to consume alcohol. 

I would have to say that my proudest "accomplishment" of the day was the diaper golf caddy that I made.  After searching pinterest high and low for ideas on diaper cakes, I figured the golf bag was best suited because dad-to-be eats, breathes and sleeps golf.  Believe it or not, it was fairly easy to make.  Check out below for instructions.


----------------------------------------------------------------------------------------------------------------------------------
I'm so excited about the Diaper Golf Caddy that I made for my sister's baby shower.  Here is how I did it:

  1. Roll up individual diapers and secure with each with a rubber band
  2. Make 4 clusters of 12 diapers (3 in the center, surrounded by 9 more diapers) in the shape of a cylinder and secure with another rubber band (or 2).
  3. Stack all 4 cylinder clusters on top of each other so the diapers in each cluster line up.
  4. Slide 3 plastic golf clubs (I found mine at Walmart (similar here) and it also came with plastic golf balls and a plastic caddy that I was able to give to mommy & daddy-to-be later as a toy for baby) through each cluster.  This will secure all of the clusters together.
  5. Wrap ribbon around each of the clusters as to hide the rubber bands.
  6. Secure a pacifier around one of the top clusters so the handle is facing outward.
  7. Slip a washcloth through the handle of the pacifier
  8. Place baby booties on top of golf clubs
  9. Create a stand (I used the cardboard part of a hanger that you get back from the dry cleaner. Just remove the cardboard from the rest of the hanger and bend in half.  I didn't secure this to the diaper caddy but it held up wonderfully and was easily placed almost anywhere to hold the caddy).


Thursday, April 11, 2013

Baby Shower Invites

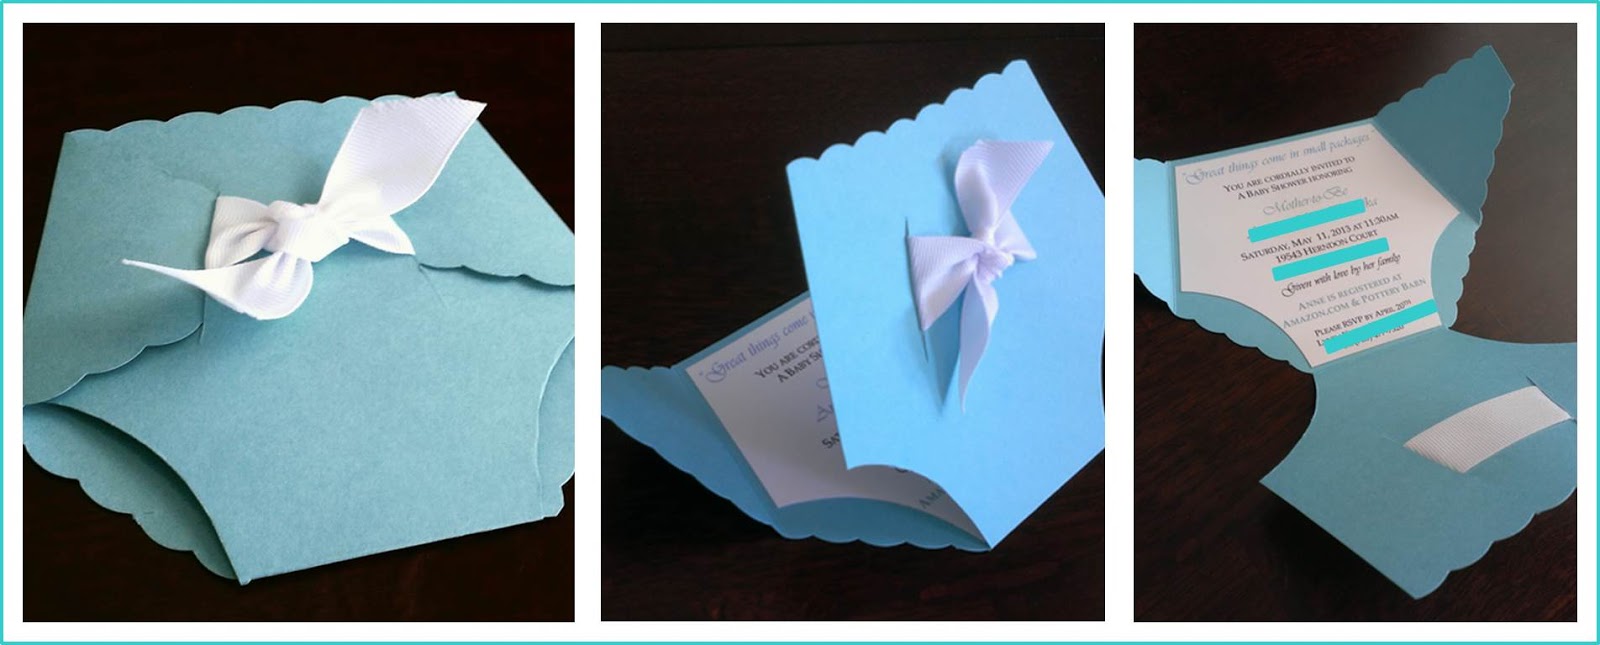
My sister is pregnant with her first baby and I couldn't be happier for her.  My mom and I are in the process of planning a baby shower that we'll be throwing for her in one month exactly (final pics to come).  Below are her invitations that I made.  I found a template through a quick google search.  If anyone's interested in that template, let me know and I can forward you the link.  I thought the diaper idea was such a cute one but beware, there are a ton of cuts and it does take some time.  I love the final outcome and overall, it was a fairly inexpensive project.  You can use any color and add more or less detail depending on the mother-to-be's taste.  In my case, my sister is in love with Tiffany & Co. (who isn't?) and I thought this color would be highly appropriate.


Monday, March 18, 2013

Monkey's St. Patrick's Day

As most other new moms, I wanted to dress Luke up for St. Patrick's Day in some sort of green shirt.  Everything I found online seemed so generic until I came across a DIY project on Pinterest.  I love this shirt and best part is, you can change it to say anything you want.  I had no clue about freezer paper until I found this and let me tell you, it is AMAZING.  
Items Needed:
Shirt: Rabbit Skins 
Paint: DecoArt

.  

Wednesday, January 9, 2013

DIY Vintage Bridesmaid Necklaces

It's starting to get down to the wire...less than a month until the big day.  One of my bridesmaids asked if I was going to provide jewelry for the girls or if I wanted them to go out and get their own.  Up until this point, I really haven't wanted everything to be matchy matchy but then I began searching the internet for vintage/romantic necklaces that I could make for the girls and voila!  I found the perfect inspiration!

From there, I had it in my head that somehow in between naps and at night after Luke went to bed, I'd create these necklaces for my bridesmaids.  Here's a DIY tutorial on how I created them but keep in mind that these are very "free flow" and you can change them up in different ways to make them look completely different:

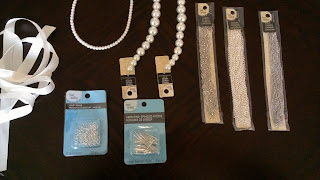
What you'll need (all can be found at your local craft store):
ribbon (about 5/8" wide)
chain (3 different kinds - I went for the thinner chain but thick would look great too)
pearl beads (2 different sizes and colors)
jump rings
head pins
wire grips (I'm actually not quite sure what the real name of these things are but they're used a lot in beading and look very much like needle nose pliers) 

How to do it:
1. Connect all three chain ends together using a jump ring

2. Cut two pieces of ribbon in equal length (keep in mind that this will be the entire length of your necklace.  You can always cut it shorter later...but you won't be able to make it longer.  I cut my pieces 41 inches long)

3. Thread both pieces through the jump ring.  The ribbon that doesn't lay with the chain (upper left hand corner in the picture below) will be the piece above the knot on the side of your neck that connects with the clasp in the back

4.Tie a knot with both pieces of ribbon around the jump ring.  This prevents the chain from slipping after you've completed the necklace and it also hides the jump ring.

5. "Braid," and I use that term loosely, the chain and the ribbon.  This is not a traditional braid but a messy one.  There are no rules when it comes to intertwining except if you want more of a messy look, allow the chain to hang more.  If you want a cleaner look, tighten the chain up.  Keep in mind that the pearl beads that you will be hanging from the necklace have some weight and will pull down on the chain slightly.

6.  Once you're happy with your "braid", connect the loose ends of the braided chains together using another jump ring.  Thread the braided ribbon through the jump ring and tie a knot (again, to hide the jump ring and prevent the chains from slipping down the ribbon later.

7. Now it's time to start adding the pearl beads. Put a head pin through the pearl bead and using the wire grips, create a hook in the end (you may need to cut off the excess if your head pin is too long).  Hook the head pin through the chain (anywhere) and tighten the hook to create a closed loop.  

8. Continue all over then necklace until you feel that you have enough.  Again, if you want a messier look, place the pearl beads all over.  If you want a cleaner look, try to keep things more symmetrical.  This was the hardest step for me because the chain would pull every which direction and I kept having to play with it until it looked right.
*Tip: by hooking two chains together when putting on a pearl bead, it will help keep the necklace from unraveling or acting "difficult" 

9. Put the necklace around your neck and decide the length that you want.  You can put clasps on the end or tie in a bow.  I kept mine in a bow.  Ta da, you have yourself a completed vintage bridesmaid necklace!  I'd love to hear your feedback and see how your necklace turned out!